The following warnings occurred:
Warning [2] Undefined variable $search_thread - Line: 60 - File: showthread.php(1617) : eval()'d code PHP 8.1.31 (Linux)
File Line Function
/inc/class_error.php 153 errorHandler->error
/showthread.php(1617) : eval()'d code 60 errorHandler->error_callback
/showthread.php 1617 eval


Thread Rating:
  • 2 Vote(s) - 3 Average
  • 1
  • 2
  • 3
  • 4
  • 5
The start of my van's body build
#11
I have been saving bits and fasteners for this build for years. I inherited a lot of assorted screws, brads and finishing nails from my father who had been collecting these from the early fifties. Much of it isn't really useful in the actual build but the large collection of wood screws in brass and steel with slotted heads will be most helpful.
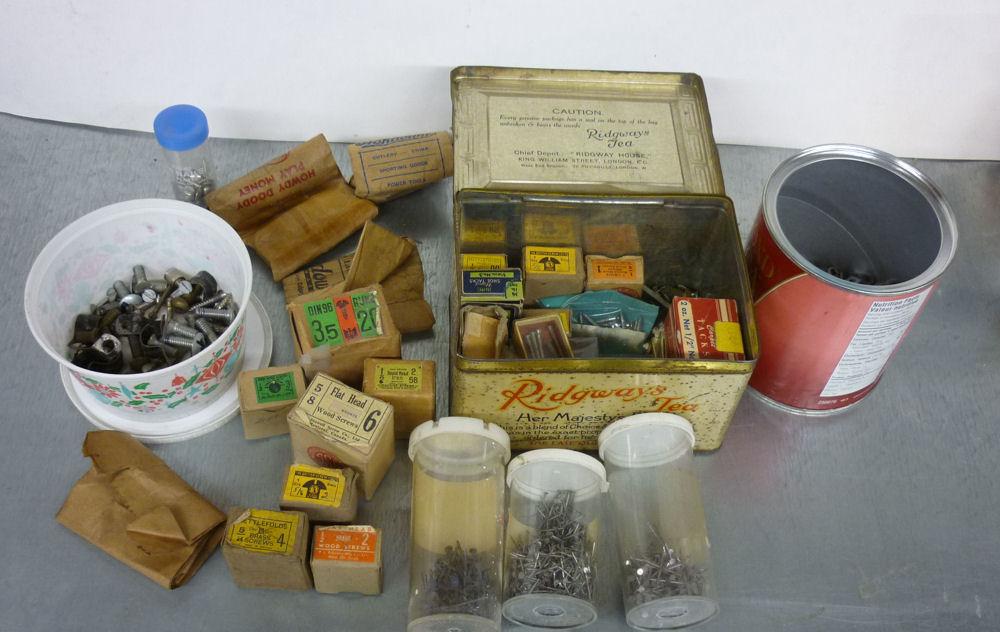


Trying to find anything that looks correct for fasteners here is a exercise in frustration as everything is pretty much Robertson type with just a few exceptions but generally the wrong size or head type.

The plan is to assemble the wood with generic screws and when everything is correct the generic screws will be removed and correct ones inserted.

Cheers,
Stephen

I'm so thankful to have a warm place to do the build. The temperature outside today is -21C which makes for difficult or impossible  to work in a unheated shop or garage.
Stephen
Reply
#12
That photo of John's workshop takes me straight back to 1981! 

I also inherited my father's collection of screws and pins, all in their paper packets and tobacco tins. Many of the descriptions would mean nothing to the staff in a present-day DIY store.

It's a good idea to use undersized screws for any trial assembly, then upsize for the final assembly. Especially important for anything like door hinges which may have to be fitted and removed several times during the build.
Reply
#13
Here are some further photos of John Heath's workshop - the beginnings of the restoration of my fabric saloon.
The hydraulics were fitted incorrectly (all trailing shoes) by a subsequent owner. Now returned to original and a more effective cables.
Nick Anderton
                       
Reply
#14
Great pics Nick. Thank you for sharing them.
Stephen

PROGRESS AND MORE QUESTIONS

The day was spent installing the A pillars which took some time to get right.


After this was done I did a trial fit of the dash board, screen bottom rail, and the fuel tank. Things don't exactly fit that well which was to be expected but there are a few questions regarding things.
The position of the dash where it sits against the screen bottom rail  looks suspect as far as the scuttle alignment is concerned. Should the wood rail sit under the folded lip as in the picture or should it sit lower with the wood exposed above it?


With the dash in the  position shown,  the fuel tank sits too high at the back with a gap between the bulkhead firewall and the front face of the tank.


Do any of our more experienced restorers have any suggestions or observations that can improve the fit?
Thanks.
Stephen
Reply
#15
Hi Stephen

The set up looks similar to my RK saloon.  However the RK has a thin steel post to which the timber door post is bolted. This also forms the structure to which the windscreen is bolted. On my RK the top of the tank is pretty much level and the face sits relatively tightly to the bulkhead with its lip forming a reasonable seal.  There isn’t much room above the tank, nor between the dash and the back of the tank….an SM5 switchbox only just fits!

Hope this helps?

Cheers

Howard
Reply
#16
I think you need to fit the scuttle first, then install the wood. 

The Dashboard is one of the last parts to fit.

I also think that the bolts you have used to hold the bottom of the A post will cause you some issues. They are screwed from the inside - from memory.

I have a built up C Cab Van body I am currently restoring for a customer - I will try and take some photos of these areas for you, tomorrow.
Reply
#17
I think I've solved the issue

John Heath instructions say:


What he didn't say was whether to install the wood screen rail on top of the A pillars or between them. It looks to me that if the screen rail is installed between the A pillars the dash will drop drown about an inch which looks like it would make it all line up.

I will put the steering column in and check the dash height against the column  bracket that bolts under the dash.

Ruairidh:
I'm not entirely sure what you mean by "the scuttle". Could you elaborate please?
 
The lower bolts you are looking at are temporary as the brackets have been taped for countersunk bolts to go in from the outside and then lock nutted on the inside.
Thank for your help and observations.

Stephen
Reply
#18
The scuttle is the aluminium skin that sits over the petrol
tank and down the sides to the flitch plates. Some discussion on it here: https://forum.wordreference.com/threads/...e.1724233/ and the closest term for North America seems to be cowl.

Here is an original Chummy I have been working on too, the wood is set between the A posts.

I will try to photograph the same with the new C Cab body later on today.

   
Reply
#19
Steve,

I have some information from John, but not comprehensive.

You are right to be cautious and all these vans are different, however one basic principle you can use to check your assembly is that a line from the top of the curved screen batten to the top of the radiator shell (not the neck, the shell itself) should be almost horizontal (slightly lower at the front by about 1/4") and just less than 90 degrees to the front of the bulkhead. If you rest a piece of bonnet moulding on top of the bulkhead lip then the line from the screen batten to the rad shell should just touch the top of it.

Assuming your pillars are cut to the right height I would expect the rail to fit between them. That how the saloons work and that appears to be what John did.

The aluminium panel in front of the screen (the scuttle top) has a right-angled upstand against which the screen fits. The top of the dash should line up with the top of this.
Reply
#20
I would suggest that the cowl/scuttle dictates the final shape of the woodwork, not the other way around.

The dashboard sits proud of the scuttle/cowl lip, to hide any shape differences. The windscreen frame rubber does a similar job.

The A posts are help in place by the windscreen frame, screws in the door opening and screws from the bottom bracket.

The top wooden section, under the cowl is screwed into place from the top and through the body skin - these are hidden by the windscreen frame.

In the photos below, the top of the A post has slotted to accept the curved section.


Have you offered your cowl/scuttle up to the floor pan?
Reply


Forum Jump:


Users browsing this thread: 2 Guest(s)