16-12-2024, 11:59 PM
I've been steady chipping away at sorting out the rear axle over the past week or so.
I didn't get many pictures, as its not the most glamorous work, but I started with cleaning out the torque tube. The upper bearing probably would have done a few miles yet, but it did feel a little more 'gritty' than some of the others, so I decided replacing it made sense. It was simple enough to knock out it, and a new one in.
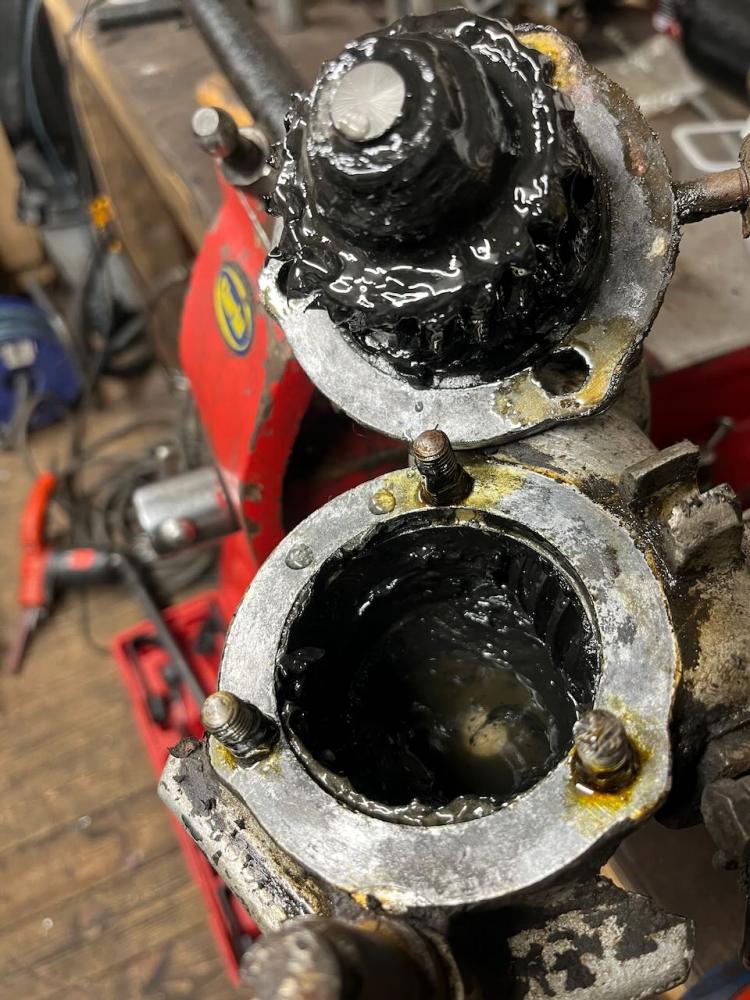
While I was at that end of the tube, I gave the torque tube anchor / socket a clean up. I say clean up, I realise the picture makes it look pretty grotty still but I cleaned the important bits properly. haha.
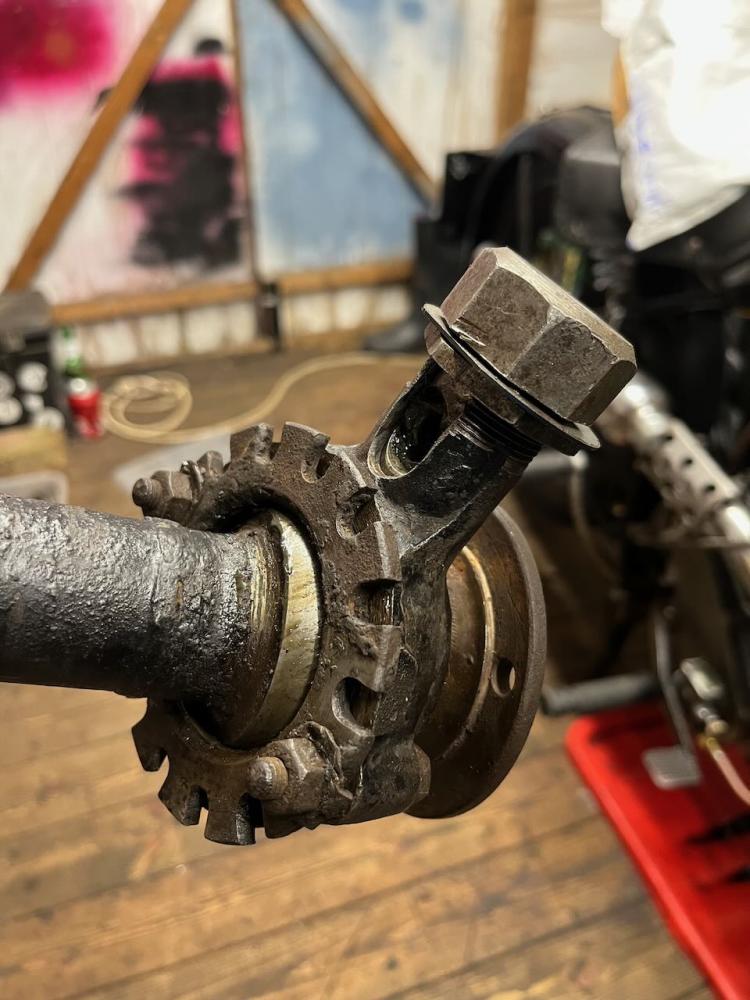
I wasn't sure if once I'd cleaned all the old hard grease and muck out that I wasn't going to be left with a joint that was worn beyond the normal adjustment range but thankfully it tightened up nicely with just 1 or 2 threads of adjustment left.
The threads in the socket are pretty heavily worn, and it made for a very sloppy fit till the collar had threaded quite a long way in. I might keep my eye out for another anchor socket for sale.
While at this end of the assembly I popped a new UJ into one end of the prop shaft. The old one was feeling a bit notchy and stiff. This feels much better.
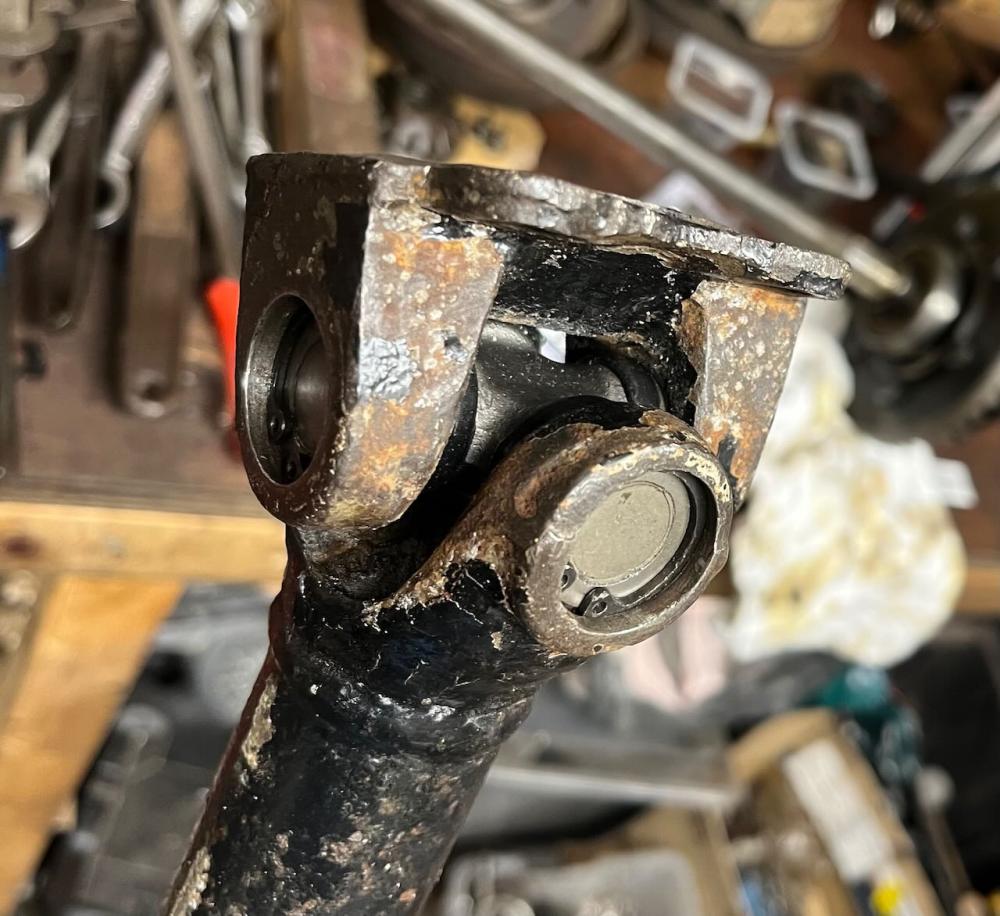
User error here.... This UJ came with a grease nipple installed. I must have got it in upside down, as after I installed the UJ the nipple was fouling restricting it's movement. Knowing that I was likely to damage the UJ if I tried to removed it and flip it over, I decided that the easiest solution was to remove the grease nipple (I mean how often do I need to grease a UJ?!) and fitted a turned down bolt to plug the port, which solved the problem nicely.
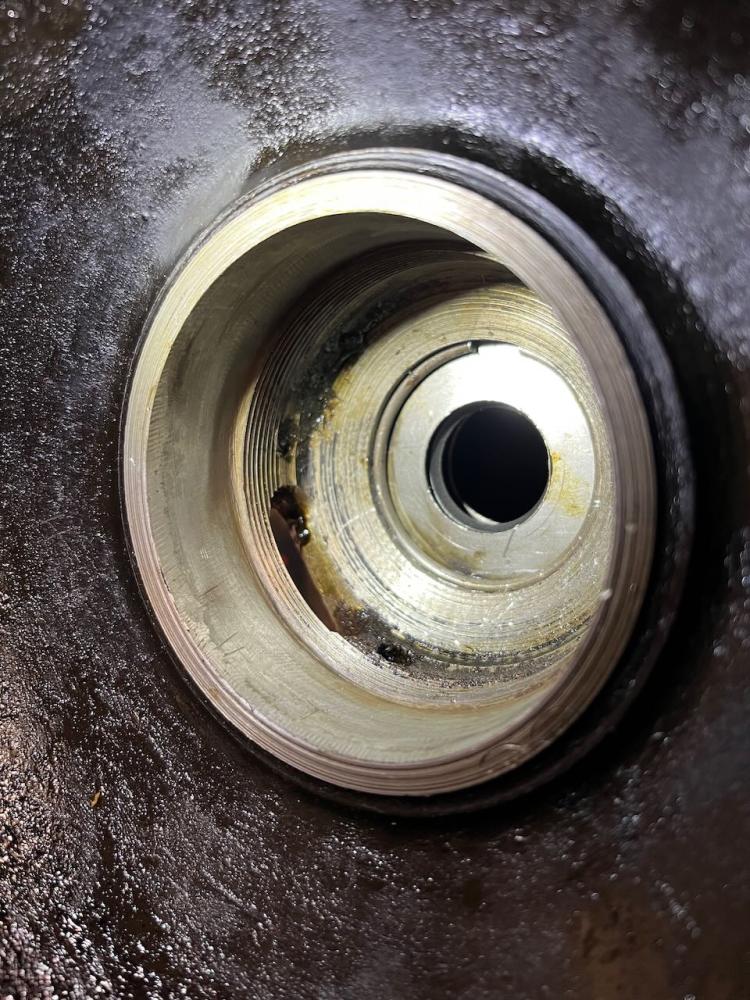
I marked the differential carrier bearing bearing adjusters, and then removed them to access the differential oil seals. I replaced both with modern rubber lips seals.
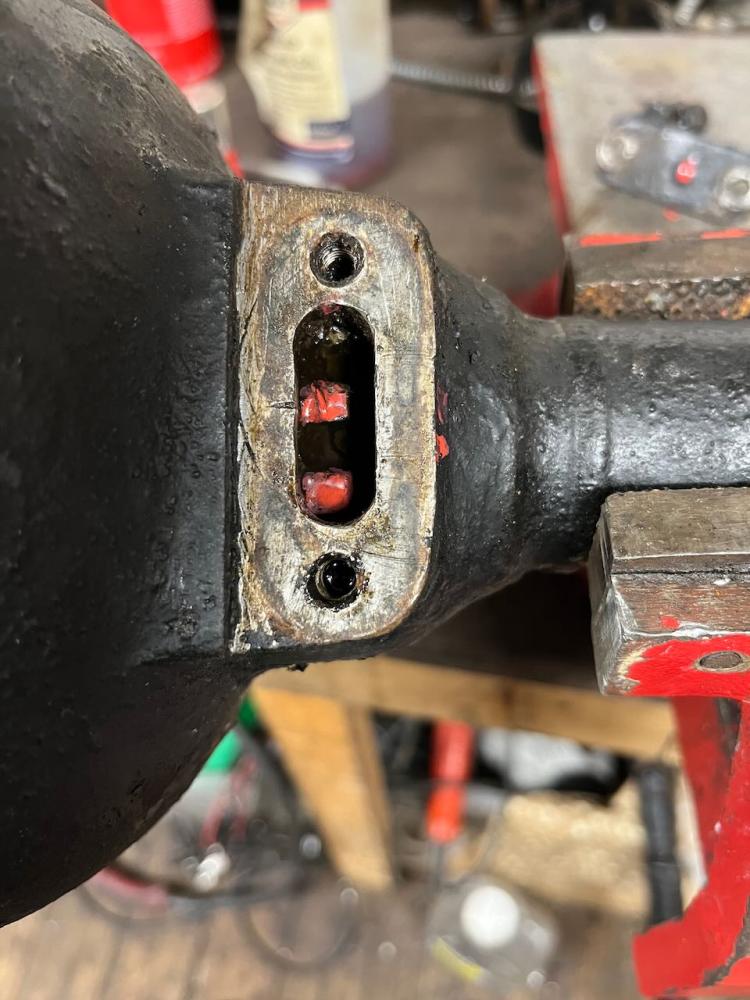
While I had this all apart, I had noticed that there was a bit of slop in the brake cams, so had ordered some new bronze bushes from a7 workshop. I hadn't anticipated that they would not be a direct fit, and would require me to drill out the bore oversize to accept the bushing. Thankfully in my random assortment of drills I did have the right size and once the new bushes were pressed in they was a nice snug fit on the brake cams.
While this is going to be my first experience with cable brakes on a car, my motorcycle (and prior to that bicycle!) experience tells me that getting cables brakes to work is all about the details. Every point of contact, every pivot needs to move as smoothly as possible. With that in mind, I lightly polished the faces of brake cams, and the ball on the brake arm. I also dressed the face of the shoes where they contact the brake cam.
After that it was a fairly simple job to start bolting bits back together.
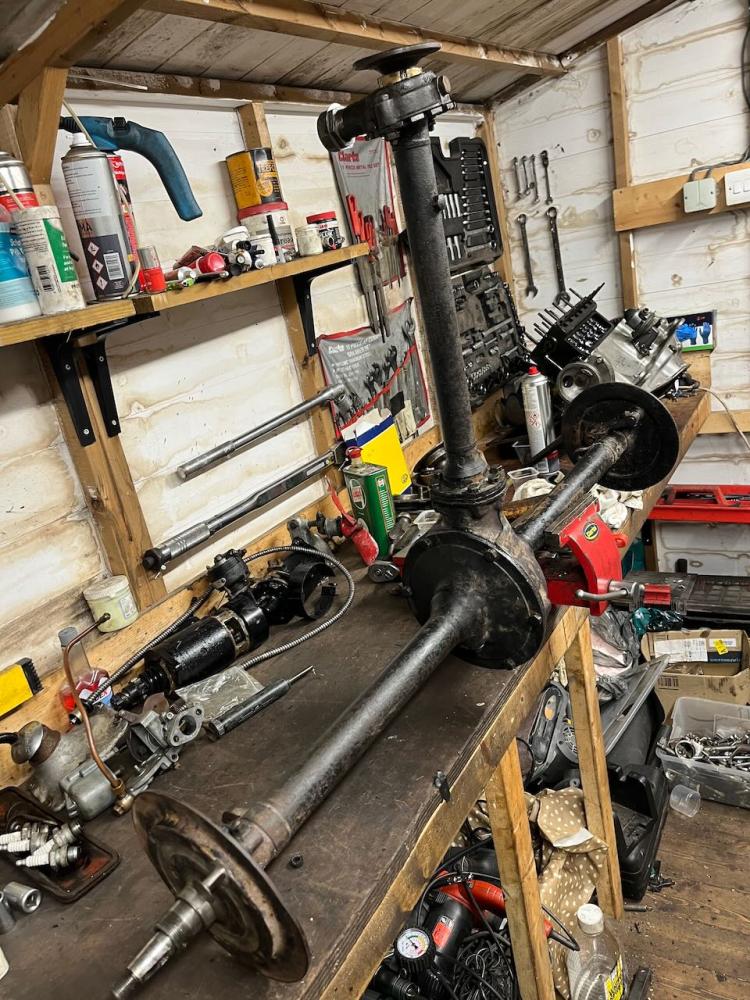
Before I stripped the axle down, I was happy things felt smooth when turned by hand and it had the correct amount of backlash on the pinion, so I didn't go through the full process of setting the mesh, reading the pattern off the teeth and all that. We will see whether this comes back to bite me in the future or not! I've been through the full set-up a couple of times, on my old Triumph Spitfire and Daimler v8, so if needs must I will, but it's not a job I particularly look forward to!
I refitted the torque tube with the same spacers as when I dismantled it and then set the backlash by adjusting the right hand side bearing adjuster. This ended up right back where it started before I took it apart. The left side adjuster went a few more teeth in before it lightly contacted the bearing, so either it was loose before, or my new gasket is a fraction thicker.
Either way I'm pleased to have got the axle back together. The brakes and hubs need to go back on, but that should be fairly simple. I was intending to leave the old felt hub seals in place, as I was upgrading to sealed wheel bearings I figured the hub seals aren't critical, but when I removed the from the hubs it was apparent they were saturated with muddy water... so yeah for the sake of a few extra quid, I've ordered some new seals, and went for new woodruff keys for the half shafts while I was at it! So I shall pause on the hubs and brakes till those bits arrive.
Anyway, with a slightly clearer work bench, I thought I better go get the steering box off. It was worrying me, this was the last part of the car that might have trapped water in it, so I really wanted to get it apart and assess the damage.

As suspected, yes that's got a bunch of water in it. Thankfully it's also got plenty grease so I don't think the water has had chance to really get to any steel parts. I will obviously do full strip down and clean up, but for tonight a wipe out and spray down with WD40 will let me sleep a little more soundly!
First impressions are that the steering box is in pretty good condition and should just require cleaning and adjustment, which is nice news
I didn't get many pictures, as its not the most glamorous work, but I started with cleaning out the torque tube. The upper bearing probably would have done a few miles yet, but it did feel a little more 'gritty' than some of the others, so I decided replacing it made sense. It was simple enough to knock out it, and a new one in.
While I was at that end of the tube, I gave the torque tube anchor / socket a clean up. I say clean up, I realise the picture makes it look pretty grotty still but I cleaned the important bits properly. haha.
I wasn't sure if once I'd cleaned all the old hard grease and muck out that I wasn't going to be left with a joint that was worn beyond the normal adjustment range but thankfully it tightened up nicely with just 1 or 2 threads of adjustment left.
The threads in the socket are pretty heavily worn, and it made for a very sloppy fit till the collar had threaded quite a long way in. I might keep my eye out for another anchor socket for sale.
While at this end of the assembly I popped a new UJ into one end of the prop shaft. The old one was feeling a bit notchy and stiff. This feels much better.
User error here.... This UJ came with a grease nipple installed. I must have got it in upside down, as after I installed the UJ the nipple was fouling restricting it's movement. Knowing that I was likely to damage the UJ if I tried to removed it and flip it over, I decided that the easiest solution was to remove the grease nipple (I mean how often do I need to grease a UJ?!) and fitted a turned down bolt to plug the port, which solved the problem nicely.
I marked the differential carrier bearing bearing adjusters, and then removed them to access the differential oil seals. I replaced both with modern rubber lips seals.
While I had this all apart, I had noticed that there was a bit of slop in the brake cams, so had ordered some new bronze bushes from a7 workshop. I hadn't anticipated that they would not be a direct fit, and would require me to drill out the bore oversize to accept the bushing. Thankfully in my random assortment of drills I did have the right size and once the new bushes were pressed in they was a nice snug fit on the brake cams.
While this is going to be my first experience with cable brakes on a car, my motorcycle (and prior to that bicycle!) experience tells me that getting cables brakes to work is all about the details. Every point of contact, every pivot needs to move as smoothly as possible. With that in mind, I lightly polished the faces of brake cams, and the ball on the brake arm. I also dressed the face of the shoes where they contact the brake cam.
After that it was a fairly simple job to start bolting bits back together.
Before I stripped the axle down, I was happy things felt smooth when turned by hand and it had the correct amount of backlash on the pinion, so I didn't go through the full process of setting the mesh, reading the pattern off the teeth and all that. We will see whether this comes back to bite me in the future or not! I've been through the full set-up a couple of times, on my old Triumph Spitfire and Daimler v8, so if needs must I will, but it's not a job I particularly look forward to!
I refitted the torque tube with the same spacers as when I dismantled it and then set the backlash by adjusting the right hand side bearing adjuster. This ended up right back where it started before I took it apart. The left side adjuster went a few more teeth in before it lightly contacted the bearing, so either it was loose before, or my new gasket is a fraction thicker.
Either way I'm pleased to have got the axle back together. The brakes and hubs need to go back on, but that should be fairly simple. I was intending to leave the old felt hub seals in place, as I was upgrading to sealed wheel bearings I figured the hub seals aren't critical, but when I removed the from the hubs it was apparent they were saturated with muddy water... so yeah for the sake of a few extra quid, I've ordered some new seals, and went for new woodruff keys for the half shafts while I was at it! So I shall pause on the hubs and brakes till those bits arrive.
Anyway, with a slightly clearer work bench, I thought I better go get the steering box off. It was worrying me, this was the last part of the car that might have trapped water in it, so I really wanted to get it apart and assess the damage.
As suspected, yes that's got a bunch of water in it. Thankfully it's also got plenty grease so I don't think the water has had chance to really get to any steel parts. I will obviously do full strip down and clean up, but for tonight a wipe out and spray down with WD40 will let me sleep a little more soundly!
First impressions are that the steering box is in pretty good condition and should just require cleaning and adjustment, which is nice news


