The following warnings occurred:
Warning [2] Undefined variable $search_thread - Line: 60 - File: showthread.php(1617) : eval()'d code PHP 8.1.31 (Linux)
File Line Function
/inc/class_error.php 153 errorHandler->error
/showthread.php(1617) : eval()'d code 60 errorHandler->error_callback
/showthread.php 1617 eval


Thread Rating:
  • 1 Vote(s) - 3 Average
  • 1
  • 2
  • 3
  • 4
  • 5
New member hello & APD rebuild
#11
Hi

I am amazed at the speed of your progress !

Thankfully, you seem to have got to things in time and no serious corrosion has been allowed to develop.

Don't forget to take a look inside the steering box.
Reply
#12
Not to worry Bob, no children were harmed in the making of this post! With twin girls, even once we've given the better stuff away to friends and charity, there's a seemingly endless supply of clothes they've grown out of to use as rags!

Thanks Ivor, yes, theres always a mixed bag of folks out there. Thankfully, whilst inconvenient, I've not found any repairable damage yet!

Duly noted Howard, I went out and checked last night and I can see that the problematic hub already draws on a little further than the good hub, so I've ordered some Loctite 660 and will build up rather than grind away!

Thanks John, taking things apart is the quick easy bit, it's making them right and putting them back together than takes time! haha. I'm aware the steering box needs dealing with sooner rather than later, but if I take any more things apart before I start putting bits back together I'm sure to start loosing track of what everything is and where it goes!
Reply
#13
I've been steady chipping away at sorting out the rear axle over the past week or so. 

I didn't get many pictures, as its not the most glamorous work, but I started with cleaning out the torque tube. The upper bearing probably would have done a few miles yet, but it did feel a little more 'gritty' than some of the others, so I decided replacing it made sense. It was simple enough to knock out it, and a new one in.

While I was at that end of the tube, I gave the torque tube anchor / socket a clean up. I say clean up, I realise the picture makes it look pretty grotty still but I cleaned the important bits properly. haha. 


I wasn't sure if once I'd cleaned all the old hard grease and muck out that I wasn't going to be left with a joint that was worn beyond the normal adjustment range but thankfully it tightened up nicely with just 1 or 2 threads of adjustment left.

The threads in the socket are pretty heavily worn, and it made for a very sloppy fit till the collar had threaded quite a long way in. I might keep my eye out for another anchor socket for sale.

While at this end of the assembly I popped a new UJ into one end of the prop shaft. The old one was feeling a bit notchy and stiff. This feels much better.


User error here.... This UJ came with a grease nipple installed. I must have got it in upside down, as after I installed the UJ the nipple was fouling restricting it's movement. Knowing that I was likely to damage the UJ if I tried to removed it and flip it over, I decided that the easiest solution was to remove the grease nipple (I mean how often do I need to grease a UJ?!) and fitted a turned down bolt to plug the port, which solved the problem nicely.

I marked the differential carrier bearing bearing adjusters, and then removed them to access the differential oil seals. I replaced both with modern rubber lips seals.


While I had this all apart, I had noticed that there was a bit of slop in the brake cams, so had ordered some new bronze bushes from a7 workshop. I hadn't anticipated that they would not be a direct fit, and would require me to drill out the bore oversize to accept the bushing. Thankfully in my random assortment of drills I did have the right size and once the new bushes were pressed in they was a nice snug fit on the brake cams. 


While this is going to be my first experience with cable brakes on a car, my motorcycle (and prior to that bicycle!) experience tells me that getting cables brakes to work is all about the details. Every point of contact, every pivot needs to move as smoothly as possible. With that in mind, I lightly polished the faces of brake cams, and the ball on the brake arm. I also dressed the face of the shoes where they contact the brake cam.

After that it was a fairly simple job to start bolting bits back together. 


Before I stripped the axle down, I was happy things felt smooth when turned by hand and it had the correct amount of backlash on the pinion, so I didn't go through the full process of setting the mesh, reading the pattern off the teeth and all that. We will see whether this comes back to bite me in the future or not! I've been through the full set-up a couple of times, on my old Triumph Spitfire and Daimler v8, so if needs must I will, but it's not a job I particularly look forward to! 

I refitted the torque tube with the same spacers as when I dismantled it and then set the backlash by adjusting the right hand side bearing adjuster. This ended up right back where it started before I took it apart. The left side adjuster went a few more teeth in before it lightly contacted the bearing, so either it was loose before, or my new gasket is a fraction thicker.

Either way I'm pleased to have got the axle back together. The brakes and hubs need to go back on, but that should be fairly simple. I was intending to leave the old felt hub seals in place, as I was upgrading to sealed wheel bearings I figured the hub seals aren't critical, but when I removed the from the hubs it was apparent they were saturated with muddy water... so yeah for the sake of a few extra quid, I've ordered some new seals, and went for new woodruff keys for the half shafts while I was at it! So I shall pause on the hubs and brakes till those bits arrive.

Anyway, with a slightly clearer work bench, I thought I better go get the steering box off. It was worrying me, this was the last part of the car that might have trapped water in it, so I really wanted to get it apart and assess the damage.


As suspected, yes that's got a bunch of water in it. Thankfully it's also got plenty grease so I don't think the water has had chance to really get to any steel parts. I will obviously do full strip down and clean up, but for tonight a wipe out and spray down with WD40 will let me sleep a little more soundly! 

First impressions are that the steering box is in pretty good condition and should just require cleaning and adjustment, which is nice news  Smile


Attached Files Thumbnail(s)
   
Reply
#14
Time for an 'end of Christmas break' progress round up I think. No major chunks of progress, but I've been chipping away here and there. I couldn't really 'finish' anything as the parts suppliers I've been using have been shut (not complaining I'm sure they deserve a break too!) but none the less time spent now is time I don't need to spend later.

One task I could finish was the steering box. I stripped it down, and cleaned it all out thoroughly. Having determined that it was actually already fairly nicely adjusted (possibly attended to in the previously stalled restoration?) I decided not to risk separating the steering arm gear from its taper, so I didn't renew the seal in there, hopefully that won't come back to bite me! If it does, it's at least fairy easily removed from the car.
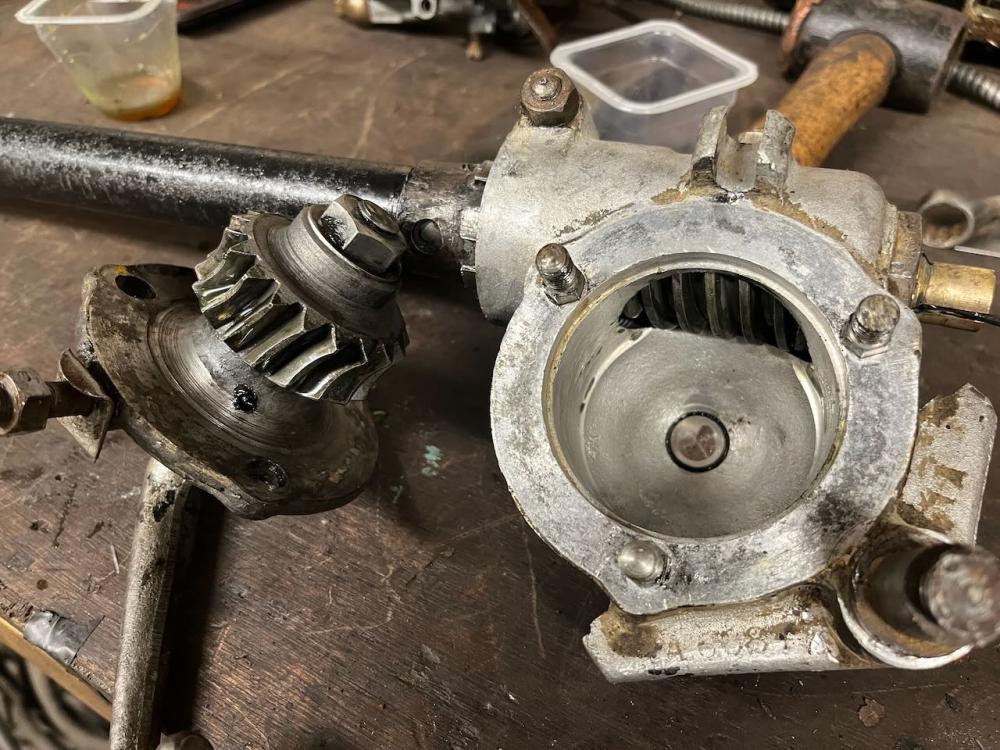
   

With a new gasket fitted with a smear of RTV, I had it back together without any drama. After some reading I decided to go with 140W oil as my lubricant of choice. It helped that I had a can of Castrol D on the shelf, but mainly the arguments for oil over grease made sense to me. If it leaks I'll wish I'd pulled the gear off the steering arm and changed that seal! haha.

As usual, as the project progresses I move from "I'll just check it's not too bad' towards '....well if I've fixed A then I'd be silly not to fix B' and sooner or later I'm basically doing a nut and bolt rebuild! With that in mind, I thought I'd better extract the rear springs and have a look at them. I presumed once I'd undone all the hardware that they would just 'come out' of the chassis, but apparently not! A bit of work with the slide hammer soon had them out though!

Glad I did, as there was quite a lot of trapped dirt and moisture around them where they go into the chassis, so good to clean that all out properly and add some corrosion protection before it goes back together.

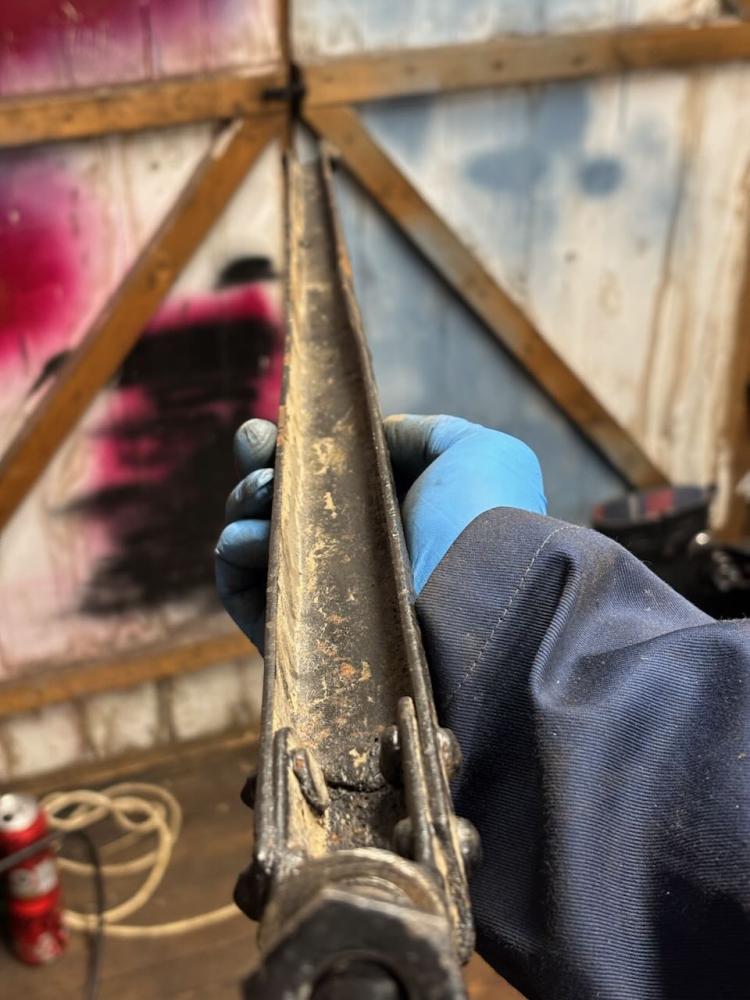
The spring pin bushes are fairly worn, as are the pins, so I'll get replacements ordered. The springs themselves also show some pretty hefty wear where the leaves have rubbed over the past 90 years.
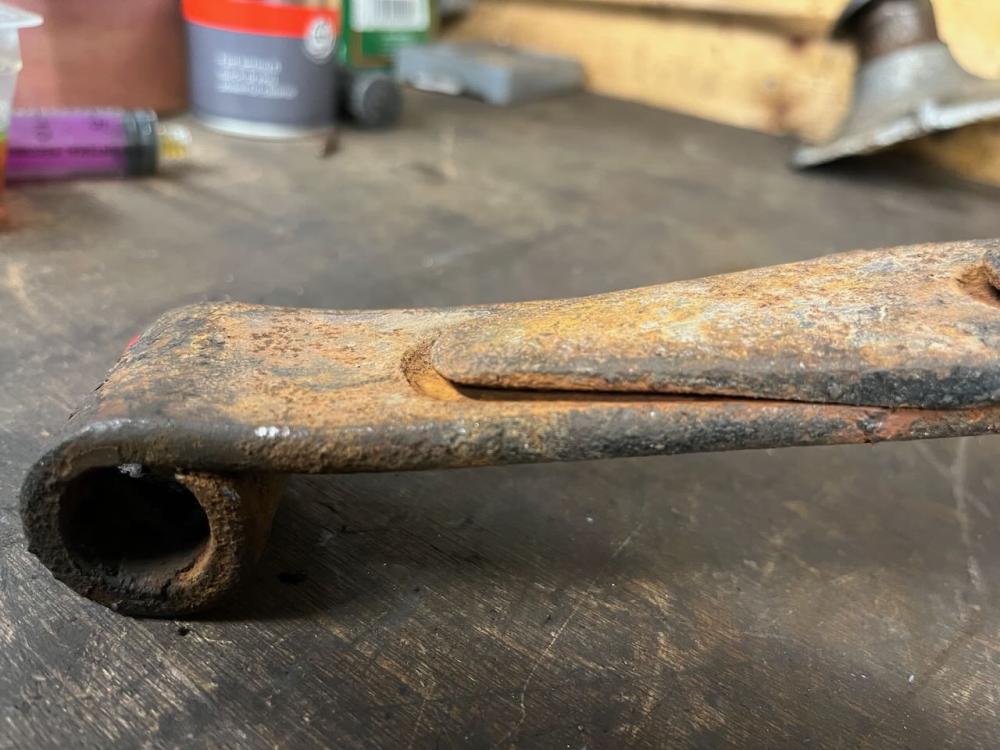
   

Some reading on the forum and some of the A7 club websites suggested that these steps aren't great news. No only will they cause the car to ride poorly and handle unpredictably, as the effective spring rate changes when the leaves hit the lip, but also in worst case scenarios can cause the load to all be transferred to the bottom leaf and this can even lead to breakage.

The fix is fairly simple, pull the leaves apart of file/grind the steps out of them.
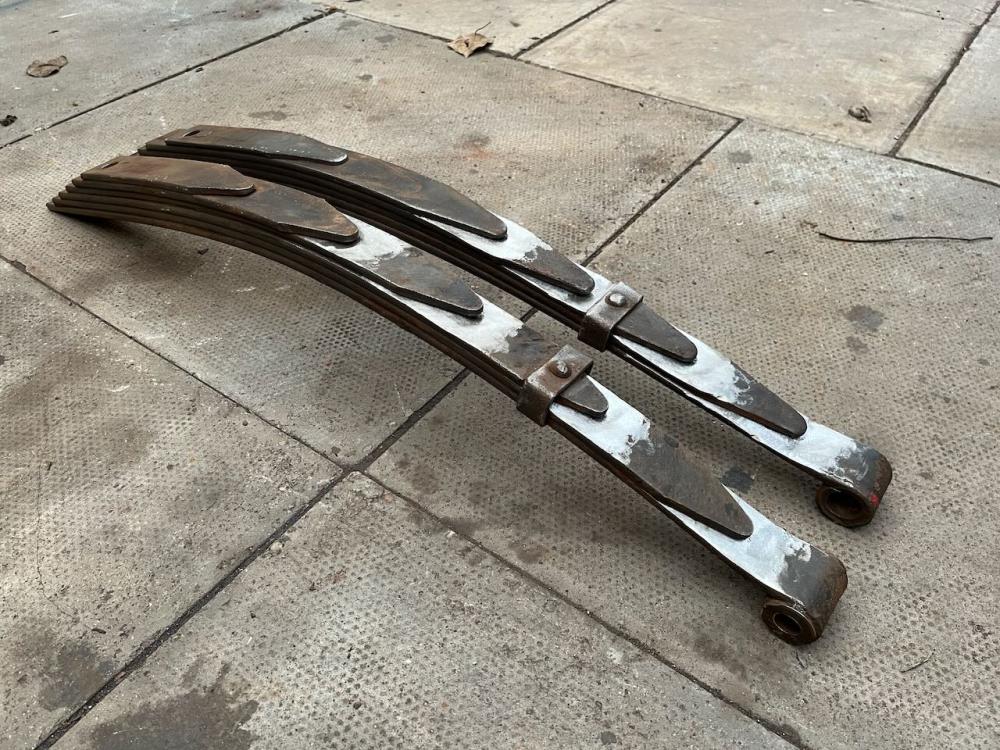
   

So thats another good job sorted. I'll give them a lick of paint and lubricate between the leaves before refitting them. I know there's some discussion about the pros and cons of lubricating leaf springs. I think lubrication is good. I want the springs to spring and leave damping to the dampers, and given the wear issues with my springs I think the wear prevention is helpful. I'll be using a motorcycle chain wax, it seems the perfect option to me, as it's designed to live in a similar environment, with metal and metal contact and to not attract dirt and dust.

It has not passed my notice that the spring appear to be different to each other.... From the wear pattern on the 2nd shortest leaf of the right hand spring, I'd guess it has been assembled from bits of other springs? Either way, they have a similar free arc and so I'll see how they ride when the car is back together!

As I had a bit of daylight and dry (a rare combination!) I thought I'd take this opportunity to remove the front suspension, so it could also be given a once over.
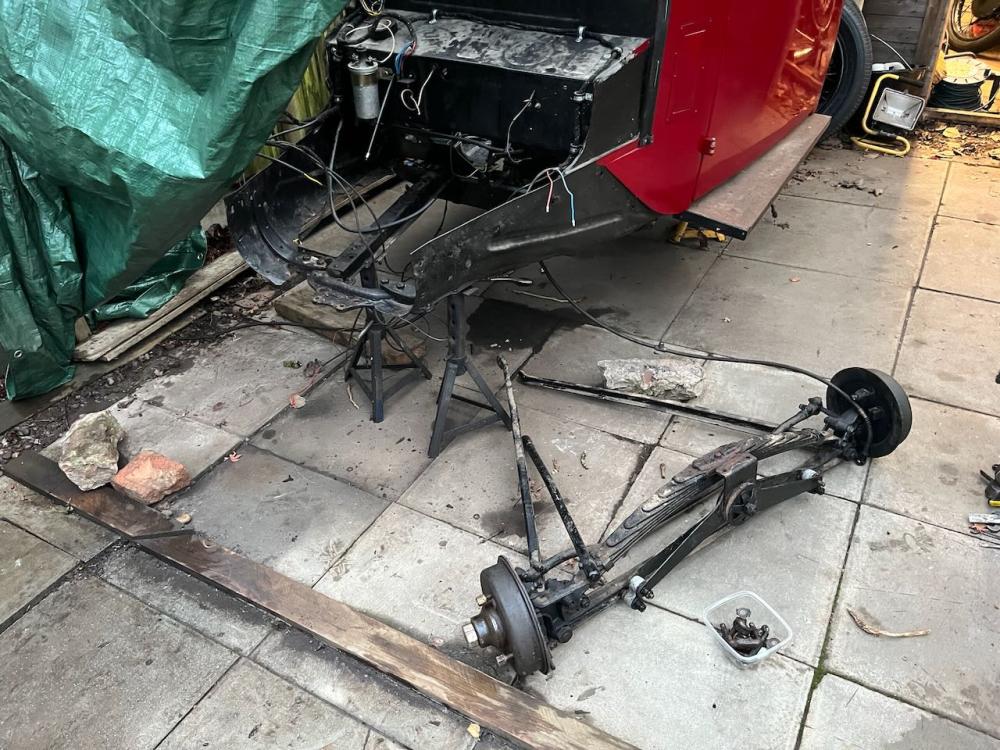
   

It came apart fairly easily, aside from the radius arm mounting bolt on the chassis side was a coach bolt that appeared to have the locating peg ground off it. So it just span when I tried to undo the nut! Perseverance and mole grips was the ultimate solution. I can't see signed of a notch or square to locate a coach bolt in the radius arm itself, so I will replace it with a hex headed bolt when the car goes back together!

The front suspension and axle components all appear to have been painted recently, but its superficial restoration as theres wear in almost every joint. The spring shackles are pretty worn.
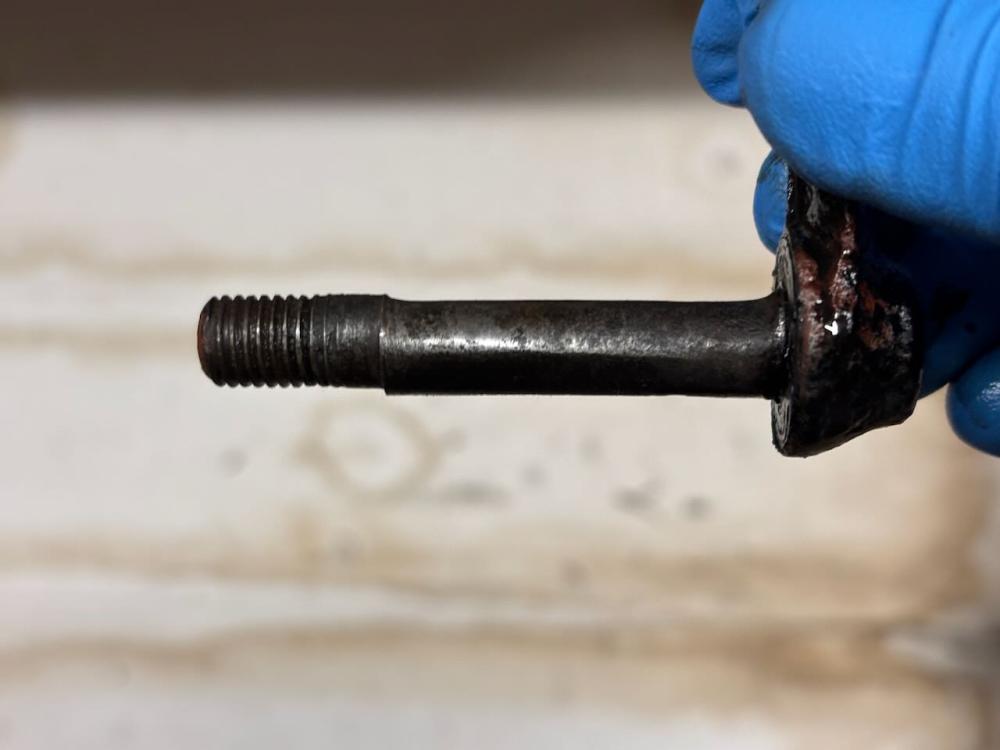
   

So I'll order some replacements, and change the bushes at the same time.

There some play in one other the track rod ends, so again I'll replace the pins and bushes.

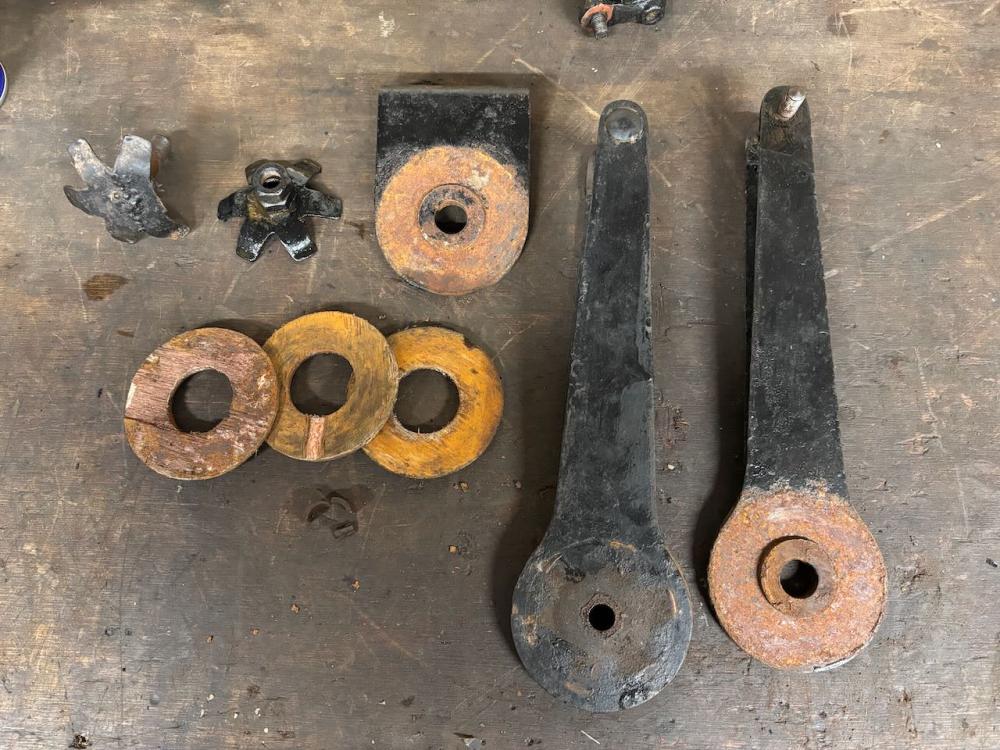
The front damper needs a bit of love, with its broken, welded and broken again star washer, disintegrated centre bushing and heavily worn (possibly home made looking?) wood friction discs.
   

The wheel bearings feel noticeably 'gritty' and when I removed the cap are dripping rusty water, so I think I'll be replacing those!

There's some play in the king pins, it doesn't feel major but it's there. I did the kingpins on my Fiat 500, and to be honest they don't feel that much better than these even after I did them! So I'll strip these and measure and inspect before jumping right to buying new parts I think.

One of the radius arms was bent, although easily straightened in the press.
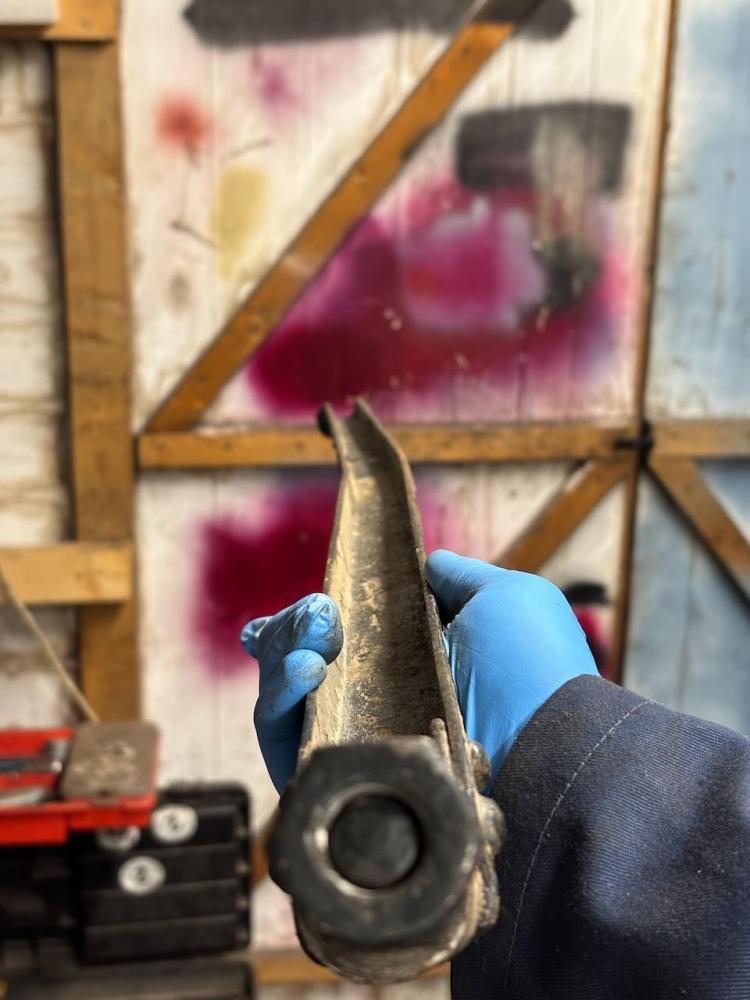


The steering drag link also had a subtle, bend, nothing like as bad as the radius arm, so I gave that a little tap straight also.

So plenty there to be keeping me busy over the next few weeks. Once again the shed is full to the brim with half rebuilt parts, the number of yoghurt pots with little collections of bolts and washers is getting out of hand! So I best get on with ordering parts, when the shops open, and start finishing some assemblies off and getting them on the car!
Reply
#15
Remarkably quick progress - very well done indeed.
Reply
#16
This is most impressive! At this rate you will be completed, run in and ready to whizz over into Hereford for 4th April, to fly the flag of Longbridge on the Centenary of the Hereford Speed Trials. If Herbert Austin put one of his own 25-30 hp cars up Frome's Hill in 1907 and sent Louis KIngs and Dudley Beck in 1924, you will be much looked forward to in the completed tourer.
Reply
#17
You have been busy, I do hope that the radius arm still fits, I once straightened one for a friend which we later found was the wrong hand and had been bent to fit.
Reply
#18
Cheers guys!

I think early April might be optimistic Steve! Whilst it's coming along nicely there's a long way to go. I do hope to be able to be out driving for summer though!

I'll bare that in mind Dave! I think they look like a left and right handed pair, but I will double check next time I'm in the shed.
Reply
#19
Hi Steve
Great to see your progress on your APD I am wondering how far the car travelled from its previous short term owner to where it now resides . And is it still in South Wales and therefore near to me
Cheers
Reply
#20
The car is in Bromsgrove, just south of Birmingham, a stones throw from where it was made!

Does this imply that you know something of the car's history?

The seller's advert and initial messages to me suggested he had a connection to the previous owner, but once I went other see the car it was clear he was a bit of a trader and in reality knew little about it. All I have is his sorry (and we now know this might not be truthful) that the car was in the process of being restored and was part finished when the previous owner passed away. I've no idea if it sat for 5 years or 25 years, or what work had been done.
Reply


Forum Jump:


Users browsing this thread: 1 Guest(s)